Here’s a way to smelt your own iron, in a bloomery furnace built of cheap and readily available materials:
Furnace Materials:
* 7 or so 10" cinder blocks
* 2 ft section of 12" square flue tile
* about 50 lbs. dried, ground clay
(Any clay will work here, but the stickier the better. If you are purchasing dry clay from a ceramic supplier, we have found ball clay works well)
* 8 lbs. Cellulose building insulation
* 5 ft of 24" wide chicken wire
* fan - high pressure/high volume, e.g. shop vac
* various pipe fittings and hose
* 1/4" thick copper for tuyere (roughly 3 x 12")
Smelting Materials: (for @ 20 lbs of bloom)
* @70 lbs roasted ore
* @ 200 lbs wood charcoal (not briquettes!)
* scrap wood for preheat
Preparing the ore and charcoal:
Finding your ore is, of course, a major project in itself, which we don’t have time and space to go into here. But when you find it, you first need to roast it. Heat the ore to a bright red color, in a wood or gas fire, and hold it at that temperature long enough to make sure it’s heated through. Quench the ore in water while it’s still hot. Your ore should now easily break up into small pieces. In this furnace you want the ore bits to be about the size of a sunflower seed. Breaking it up this small will also produce a lot of dust and fines, which is ok- we’ll smelt it all. Pick out any obvious impurities.
Note: Once your ore is roasted and cooled, the process of breaking the ore may take several hours for one person to prepare 60 lbs. The ease of crushing will depend largely on the type and quality of oreProcuring your charcoal is also a major project. There are many reasonable methods to produce your own, which you’ll probably want to do, as real wood charcoal seems to be selling for about 50 cents a pound these days. Break up your charcoal until the pieces are about 1", and sift out the fines through a 3/8" mesh. Save the fines for the furnace base.
Note: We have found that the process of breaking and screening charcoal is greatly speeded by constructing a breaking table like the one seen below . (Original design by Sauder and Williams) A small piece of heavy industrial flooring grid from the scrap yard forms the upper working surface. Ideally this is a one inch grid, you may have to weld in a few extra bars. This is surrounded by a short wood box to contain the charcoal. Below this is hung a second box, this one with 1/4 to 3/8" hardware cloth. In use 5 - 10 lbs of charcoal from the bag are placed on the top surface and 'pounded through' with wooden mallets. As the broken material is collected on the angled lower screen, it is raked off on to a waiting tarp. The fines pass through the lower grid and are collected in a plastic or wooden box below. With this rig one person can process the required 200 lbs of charcoal in roughly 45 minutes! REMEMBER THAT DUST MASK!!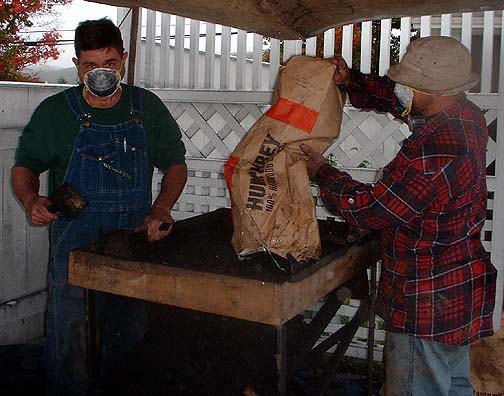
Forge a Tuyere:
Using 1/4" or thicker copper plate, roll up a tube of approximately 1" interior diameter, about a foot long. If you flare one end it will make it easier to attach to your air supply. Although we will be operating at temperatures way above the melting point of copper, it will conduct away the heat to the outside of the furnace rapidly enough to keep it from melting.
Another good working tuyere is a cylindrical ceramic tube purchased from the pottery supply where you got your dried clay. Get the type intended for porcelain kilns (rated to about 1200 C), roughly 1 inch ID by 12 inches long. These cost about $5 each and should last through a couple of uses.Building the furnace:
First, you need a dry, elevated base for your furnace. Stack the cinder blocks into a rough square, leaving a space open in front, like so (plan view)
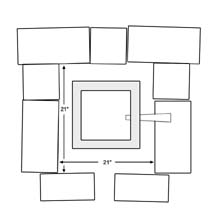
Fill and pack the center of the hearth you’ve created with charcoal fines, level to the top of the cinder blocks
Note: It was found that arranging a set of larger concrete blocks in the arrangement below allowed for easier extraction of the bloom at the end of the smelt. This allows you to rotate the two front blocks under the tap arch to open a wide space - while still supporting the structure. Setting the whole structure on a piece of metal sheet or plate not only makes for a stable and level base, it also cuts off any moisture from the ground underneath that can rob heat energy from the smelter.
Next, you need to build the furnace shaft itself. On one side of your flue, drill a hole large enough for your tuyere 6" or 7" from the bottom, centered right to left. Make sure it’s large enough to allow the tuyere to protrude inside the tile 2 1/2", and angling downwards 22-25 degrees.
On an adjacent side of the tile cut a slag tapping arch out of the bottom edge, about 3" tall and 6" wide.
The best way to cut these tiles seems to be to drill a series of small holes with a hammer drill, then chip out the piece you want to remove. If the tile cracks a bit, it’s no big deal, as it’s going to crack as soon as you light a fire in it anyway. Set the tile on top of your charcoal base.
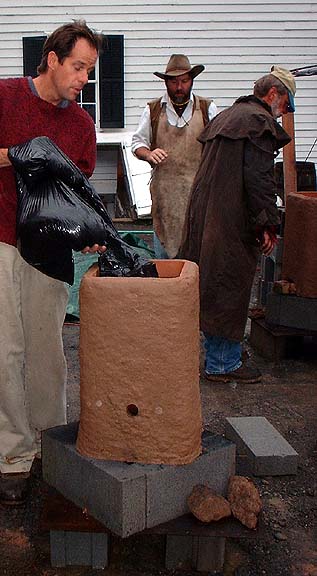
Note: the process of drilling out the tile as described will take about 45 plus minutes.Now, to sheath the furnace with clay. This will hold the whole thing together. Weigh out your cellulose, and thoroughly shred the clumps. Mix in the clay, coating all the cellulose with clay. Next add water, and knead it to the consistency of cold gooey oatmeal. For 50 lbs of dry clay, this may require almost 50 lbs of water. Plaster the outside of the flue tile with the clay mixture 3/4" or 1" thick.
Note: Preparing the raw clay and mixing in the filler to the required consistency will take two people roughly 45 to 60 minutes.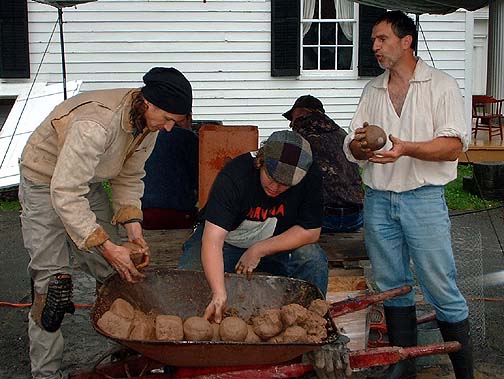   |
Wrap the furnace with the chicken wire, and twist the loops of the wire to tighten the whole thing up. Use the leftover clay to buttress out the bottom foot of the shaft where it rests on the base, and use some clay to lute the tuyere into place. Save a little clay for patching and emergency repairs.
Note: Packing and finishing the smelter will take two people roughly 45 to 60 minutes.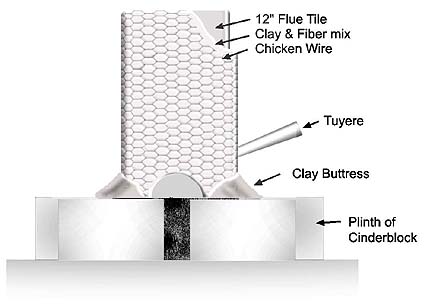
The drawing above gives an idea of the whole assembly.
Now hook up your air supply to your tuyere. The following schematic gives you the basic idea. You may put a valve in the hose before the T; we prefer a dump valve on the T opposite the hose. Or you may use a variable speed fan. What’s important here is that the sight glass is removable for clearing the tuyere during smelting, and that all connections are reasonably stable and airtight.
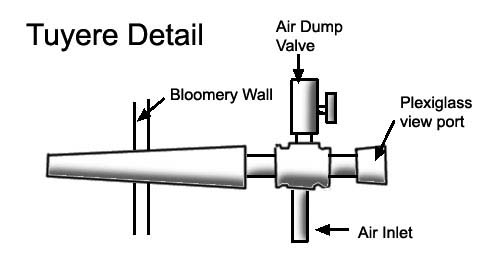
The tuyere protrudes approximately 2.5" into the furnace and dips down at an angle of 22 degrees.
Note: a simple way to provide for this necessary angle is to pre cut a scrap piece of 4 x 4 to the desired angle. This will both help you set the correct angle, but also provide a stable base for the air supply assembly. Remember that a fast gage for the correct angle can be made by folding a square piece of paper on the diagonal twice.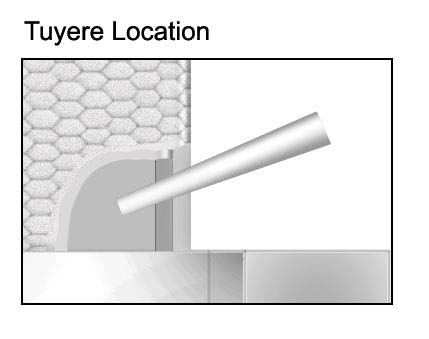
Now to Smelt!
Light a gentle wood fire, with natural draft through the tap arch, to dry and preheat the clay. On the first run of the furnace, this will take well over an hour. Poke any bubbles forming under the clay to let the steam escape.
Note: Experience has shown that a series of holes, pushed through the clay to the tile underneath with a 1/4" dia stick (or pencil!), are ideal. These will not only vent steam during the drying process, but also let you see the progress of heating along the height of the smelter. What the Gangue calls 'Light Brights'.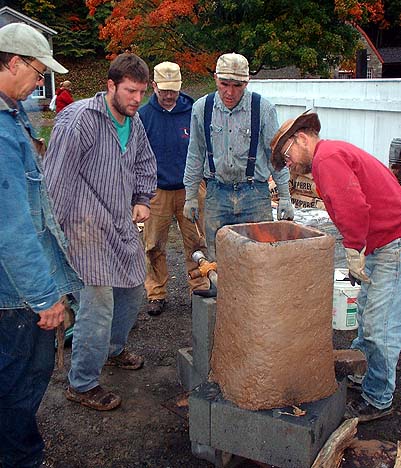
When the clay is mostly dry, fill the furnace with charcoal, block the slag arch with a brick, and turn on the air. From now on, you will keep the furnace full to the brim at all times. Set your air rate so you burn 4 lbs of charcoal every 10 minutes. This 4 lb charcoal charge will be your basic unit of measurement throughout the smelt. When you see a really nice bright white heat through the tuyere, and maintain that temperature for maybe half an hour, you may begin to charge ore.
Note: A standard 2 gallon galvanized pail holds a bit more that this charcoal charge amount. Weigh out the amount and mark your pail for easy loading. Experience has found that adding a simple metal bar handle to the bucket keeps hands (and hair!) away from the top of the smelter.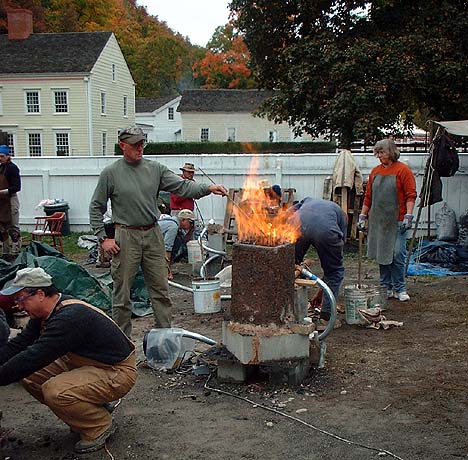
Sprinkle the ore evenly on top of the charcoal bed. At first, add only a half pound of ore to every 4 lbs. of charcoal burned, gradually increasing it until you are adding 3 or 4 lbs of ore for every 4 lbs of charcoal burned. It should take you 3 or 4 hours to work up to this charging rate. If you add it too fast, the furnace will start to cool, indicating you should back off on your ore charges. Your burn rate can increase to 7 or 8 minutes for 4 lbs charcoal.
Monitor your fire through the sight glass. Use a rod to clear slag from the tuyere if necessary.
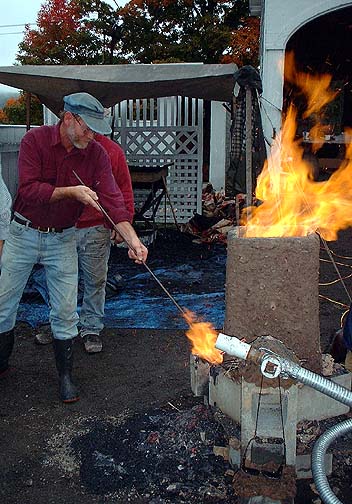
After you’ve charged 60 or 70 lbs of ore, remove the block from the arch. Poke in there gently and see what’s going on. Your goal is to keep the lower part of the furnace full of slag. The slag is not just impurities to be removed- it is a vital part of the reduction process. If the slag rises high enough to start blocking the tuyere, poke in and let some run out. Cool it in water, break it up, and return it to the top of the furnace. Any slag that is black and freely running, indicating a high iron content, can be recharged onto the furnace. Only discard slag if it is thick and gooey, indicating a low iron content.
Tapping and recycling slag ensures a constant flow of iron rich material through and around the bloom, this is what makes it nice and solid. When the slag begins to get thick and gooey, you’ll know it’s about time to finish.
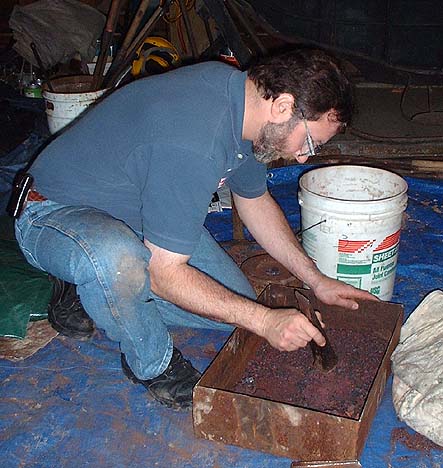
7 or 8 hrs after your first charge, you’ll be ready to remove your bloom. Scoop charcoal fines from under the base of the furnace. Using a rod from above, knock the bloom out the bottom of the furnace.
If you have enough energy left to start forging it now, you’ll save a lot of reheating time. Work the bloom gently at a low welding heat until it starts to consolidate, then take full welding heats until you have a solid billet. Now sing the smelting song:
Eeeeeeeeee blacksmiths are numerous,
Aaaaaaah but those who can melt iron from stone have grown rare.
Beekillers are many.
Lionhunters are few.
-West African Song